Using Mapbox GL JS, Mapbox Forward Geocoding with React

I’ve always been a fan of Mapbox. Maybe because I’ve found most developers using it, I think I love it due to its simplicity and ease of set-up. Besides this, Mapbox provides a powerful way to customize your map, and their documentation is pretty great.
In this tutorial, I’ll be showing you how to use React, React hooks, and Mapbox GL JS to build:
- interactive map with custom marker
- forward geocoding in Mapbox
Getting started
First, you’ll need an API access token to configure Mapbox GL JS for routing and geocoding. Go to mapbox.com, create an account. On your dashboard, create a token. Please note that this tutorial assumes you have a basic understanding of React.
Setting up our project
Step 1: On your terminal, run npx create-react-app mapbox-demo to create our react project. Once the installation is done, enter your project folder with cd mapbox-demo.
Step 2: Let us also install the Mapbox GL JS library and Mapbox SDK since we’ll be using it.
npm install mapbox-gl @mapbox/mapbox-sdk
Step 3: In your src folder, create a components folder. Inside the folder, you’ve just created, create a GenerateMap.js file.
Your project structure should look like this
...
└── src
    ├── components
    │   └── GenerateMap.js
    │
    ├── App.css
    ├── App.js
...
Now let’s start by writing some code 😋
Create the HTML page
Open the public/index.html file and paste the following code inside it.
<!DOCTYPE html>
<html lang="en">
  <head>
    <meta charset="utf-8" />
    <link rel="icon" href="%PUBLIC_URL%/favicon.ico" />
    <meta name="viewport" content="width=device-width, initial-scale=1" />
    <meta name="theme-color" content="#000000" />
    <meta
      name="description"
      content="Create a React app that uses Mapbox GL JS and Mapbox forward geocoding."
    />
    <link rel="apple-touch-icon" href="%PUBLIC_URL%/logo192.png" />

    <link rel="manifest" href="%PUBLIC_URL%/manifest.json" />
      <link href='https://api.mapbox.com/mapbox-gl-js/v2.1.1/mapbox-gl.css' rel='stylesheet' />

    <title>Using Mapbox GL JS, Mapbox forward geocoding with Reactjs.</title>
  </head>
  <body>
    <noscript>You need to enable JavaScript to run this app.</noscript>
    <div id="root"></div>

  </body>
</html>
This code creates the structure of the HTML page. Here we have the div that contains the id that holds the root of the page. We also have the mapbox-gl.css link at the headtag.
Create the React App
Open the GenerateMap.js file. Add the following code into it.
import React, { useEffect, useRef, useCallback } from 'react';
import mapboxgl from '!mapbox-gl'; // eslint-disable-line import/no-webpack-loader-syntax
import mbxGeocoding from '@mapbox/mapbox-sdk/services/geocoding';

const GenerateMap = () => {
	return <React.Fragment />
}

export default GenerateMap;
We’ve decided to import a few things here. The Mapbox SDK provides us with services for working with geocoding. And don’t worry, the <React.Fragment/> will be changed later.
Next, let us initialize the map. This code will run immediately after the page mounts.
const map = useRef(null);
const mapContainerRef = useRef(null);
mapboxgl.accessToken = process.env.REACT_APP_MAPBOX_API; // your mapbox api

useEffect(() => {
    if (map.current) return; // Checks if there's an already existing map initialised.

    map.current = new mapboxgl.Map({
      container: mapContainerRef.current,
      style: 'mapbox://styles/mapbox/streets-v11',
      zoom: 9,
      center: [3.361881, 6.672557],
    });

    // clean up on unmount
    return () => map.current.remove();
  }, [])
The mapContainerRef is needed to render the map into an HTML element.
Here we added the Mapbox map within a React useEffect hook. This ensures that the map will render before React tries to create the element that contains the map. This also takes a set of options:
container: This option tells Map JS to render the map inside the specified DOM element. Here, the map expect the receive the mapContainerRef .
style: This option defines the style the map will use. Here, we added mapbox://styles/mapbox/streets-v11
The Zoom and Center options help to determine the map zoom level and center coordinate. Here, we set the zoom level to 9 and the center which receives the longitude and latitude where the map should be center to [3.361881, 6.672557].
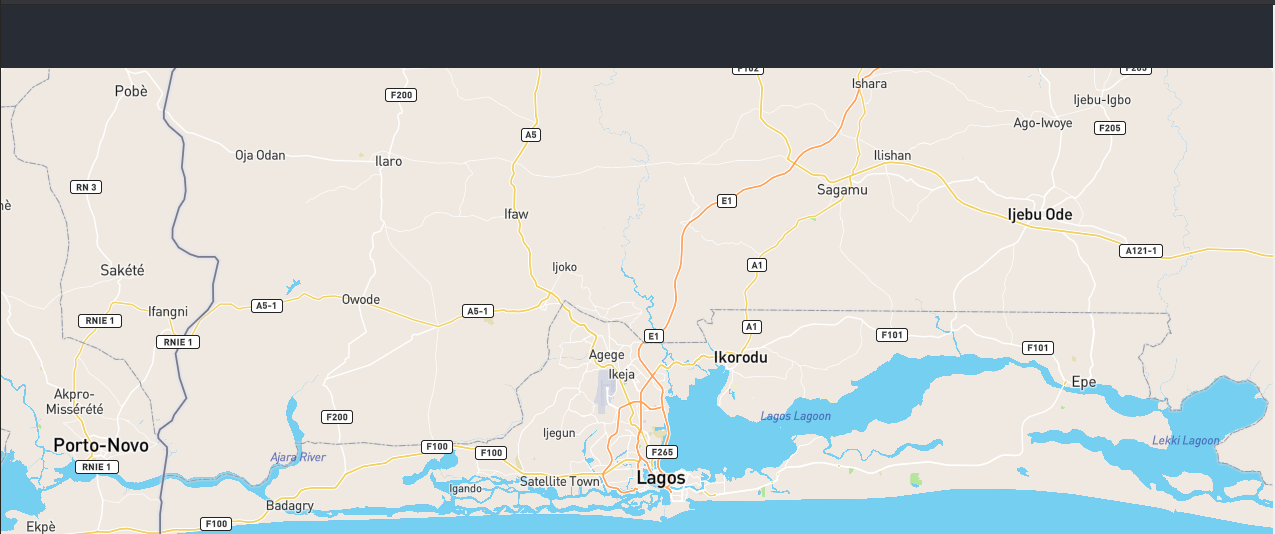
Note that the coordinate I added here is for Lagos, Nigeria. You can change it to your own choice.
Render Map
Now, let us render the map
 return (
    <div>
      <div ref={mapContainerRef} className='map-container' />
    </div>
  );
The mapContainerRef specifies the entry point to which the map will be rendered on the page.
The map also needs to be corrected with few styles. Add the following code to your app.css file.
.map-container {
  width: 100%;
  height: 500px;
  border-radius: 5px;
}
Open App.js file and paste the below code.
import logo from './logo.svg';
import './App.css';
import Mapbox from './components/GenerateMap';

function App() {
  return (
    <div className='App'>
      <header className='App-header'>
        <img src={logo} className='App-logo' alt='logo' />
        <p>
          Edit <code>src/App.js</code> and save to reload.
        </p>
        <a
          className='App-link'
          href='https://reactjs.org'
          target='_blank'
          rel='noopener noreferrer'
        >
          Learn React
        </a>
      </header>
      <Mapbox />
    </div>
  );
}

export default App;
Here, we import our GenerateMap.js into App.js . This is to render the map.
If you’ve followed the code well, you should be having the below on your browser.

Mapbox Geocoding
Now, let us talk about geocoding and how it’s been used in Mapbox.
Geocoding is the process of transforming a description of a location — such as a pair of coordinates, an address, or a name of a place — to a location on the earth’s surface.
The Mapbox Geocoding API does two things: forward geocoding and reverse geocoding.
Forward geocoding converts location text into geographic coordinates, turning Ikeja, Lagos into 3.33333, 6.58333.
Reverse geocoding turns geographic coordinates into place names, turning 3.33333, 6.58333 into Ikeja, Lagos. These location names can vary in specificity, from individual addresses to states and countries that contain the given coordinates.
Okay, let us go back to our code.
You will need to set up Mapbox geocoding to allow it to transform our location. Now, add the following code to GenerateMap.js file.
const fetchData = useCallback(() => {
    const geocodingClient = mbxGeocoding({
      accessToken: mapboxgl.accessToken,
    });

    // geocoding with countries
    return geocodingClient
      .forwardGeocode({
        query: 'Ikeja, Lagos',
        countries: ['ng'],
        limit: 2,
      })
      .send()
      .then((response) => {
        const match = response.body;
        const coordinates = match.features[0].geometry.coordinates;
        const placeName = match.features[0].place_name;
        const center = match.features[0].center;

        return {
          type: 'Feature',
          center: center,
          geometry: {
            type: 'Point',
            coordinates: coordinates,
          },
          properties: {
            description: placeName,
          },
        };
      });
  }, []);
Here, we added the Mapbox geocoding SDK into the ReactuseCallback hook. We then passed in accessToken option.
Since this tutorial focused on forward geocoding, We’ve decided to work with the forwardGeocode method. This also takes a set of options:
- The
queryoption to receive the location to be converted. When you make a query, you get a response, a JSON-formatted document of the most relevant results from your query. - The
countriesoption takes the array of string of the country code you are trying to find. ng is the internet country code for Nigeria. - The
limitoption is to limit the search result. Here, we used 2.
Click here to read more about geocoding options and services.
Display the new geometry coordinate
Now that we’ve been able to fetch the forward geocoding address, let’s create an additional useEffect hook to call the function. Add the following code:
useEffect(() => {
     if (!map.current) return; // Waits for the map to initialise

    const results = fetchData();

    results.then((marker) => {
      // create a HTML element for each feature
      var el = document.createElement('div');
      el.className = 'marker';

      // make a marker for each feature and add it to the map
      new mapboxgl.Marker(el)
        .setLngLat(marker.geometry.coordinates)
        .setPopup(
          new mapboxgl.Popup({ offset: 25 }) // add popups
            .setHTML('<p>' + marker.properties.description + '</p>')
        )
        .addTo(map.current);

      map.current.on('load', async () => {
        map.current.flyTo({
          center: marker.center,
        });
      });
    });

  }, [fetchData]);
Here are few things we did:
- We load the new geometry coordinate
fetchData()and do a check once there’s an update. **new mapboxgl.Marker()**creates a marker and using thesetLngLat()method to set a new coordinate. And we use thesetPopup()method to create a popup showing the coordinate description whenever the marker is clicked.- We wrote a Mapbox GL JS
map.on('load')function that helps to load the new values and usingmap.flyTo()to re-center the map to our new value whenever there’s a change to the geometry center.
You may also notice that we created a new div element with marker className. Now, let us add styling to our marker. In addition to your previous styling, add the following code to your app.css file.
/* Marker */
.marker {
  height: 15px;
  width: 15px;
  border-radius: 50%;
  background-color: blue;
  cursor: pointer;
}

.marker:before,
.marker:after {
  content: '';
  display: block;
  position: absolute;
  top: 0;
  right: 0;
  bottom: 0;
  left: 0;
  border: 1px solid blue;
  border-radius: 50%;
}

.marker:before {
  animation: ripple 2s linear infinite;
}

.marker:after {
  animation: ripple 2s linear 1s infinite;
}

@keyframes ripple {
  0% {
    transform: scale(1);
  }
  50% {
    transform: scale(1.3);
    opacity: 1;
  }
  100% {
    transform: scale(1.6);
    opacity: 0;
  }
}
Save your work and go back to the browser page. There is a marker with a ripple effect indicating the position of our new location. You can click the marker to view the description.
Finally!!!😊
You have successfully created a React app that uses Mapbox GL JS and Mapbox forward geocoding. If you’ve followed the tutorial to this point, your final result should look like this:

The complete code for this tutorial can be found at https://github.com/sadewole/Mapbox-Reactjs
--
You can like and do leave a comment for any contribution to this article on medium. Thank you for reading.